VPN Settings
This guide explains how to manage VPN profiles in KIOPS and securely access remote infrastructure.
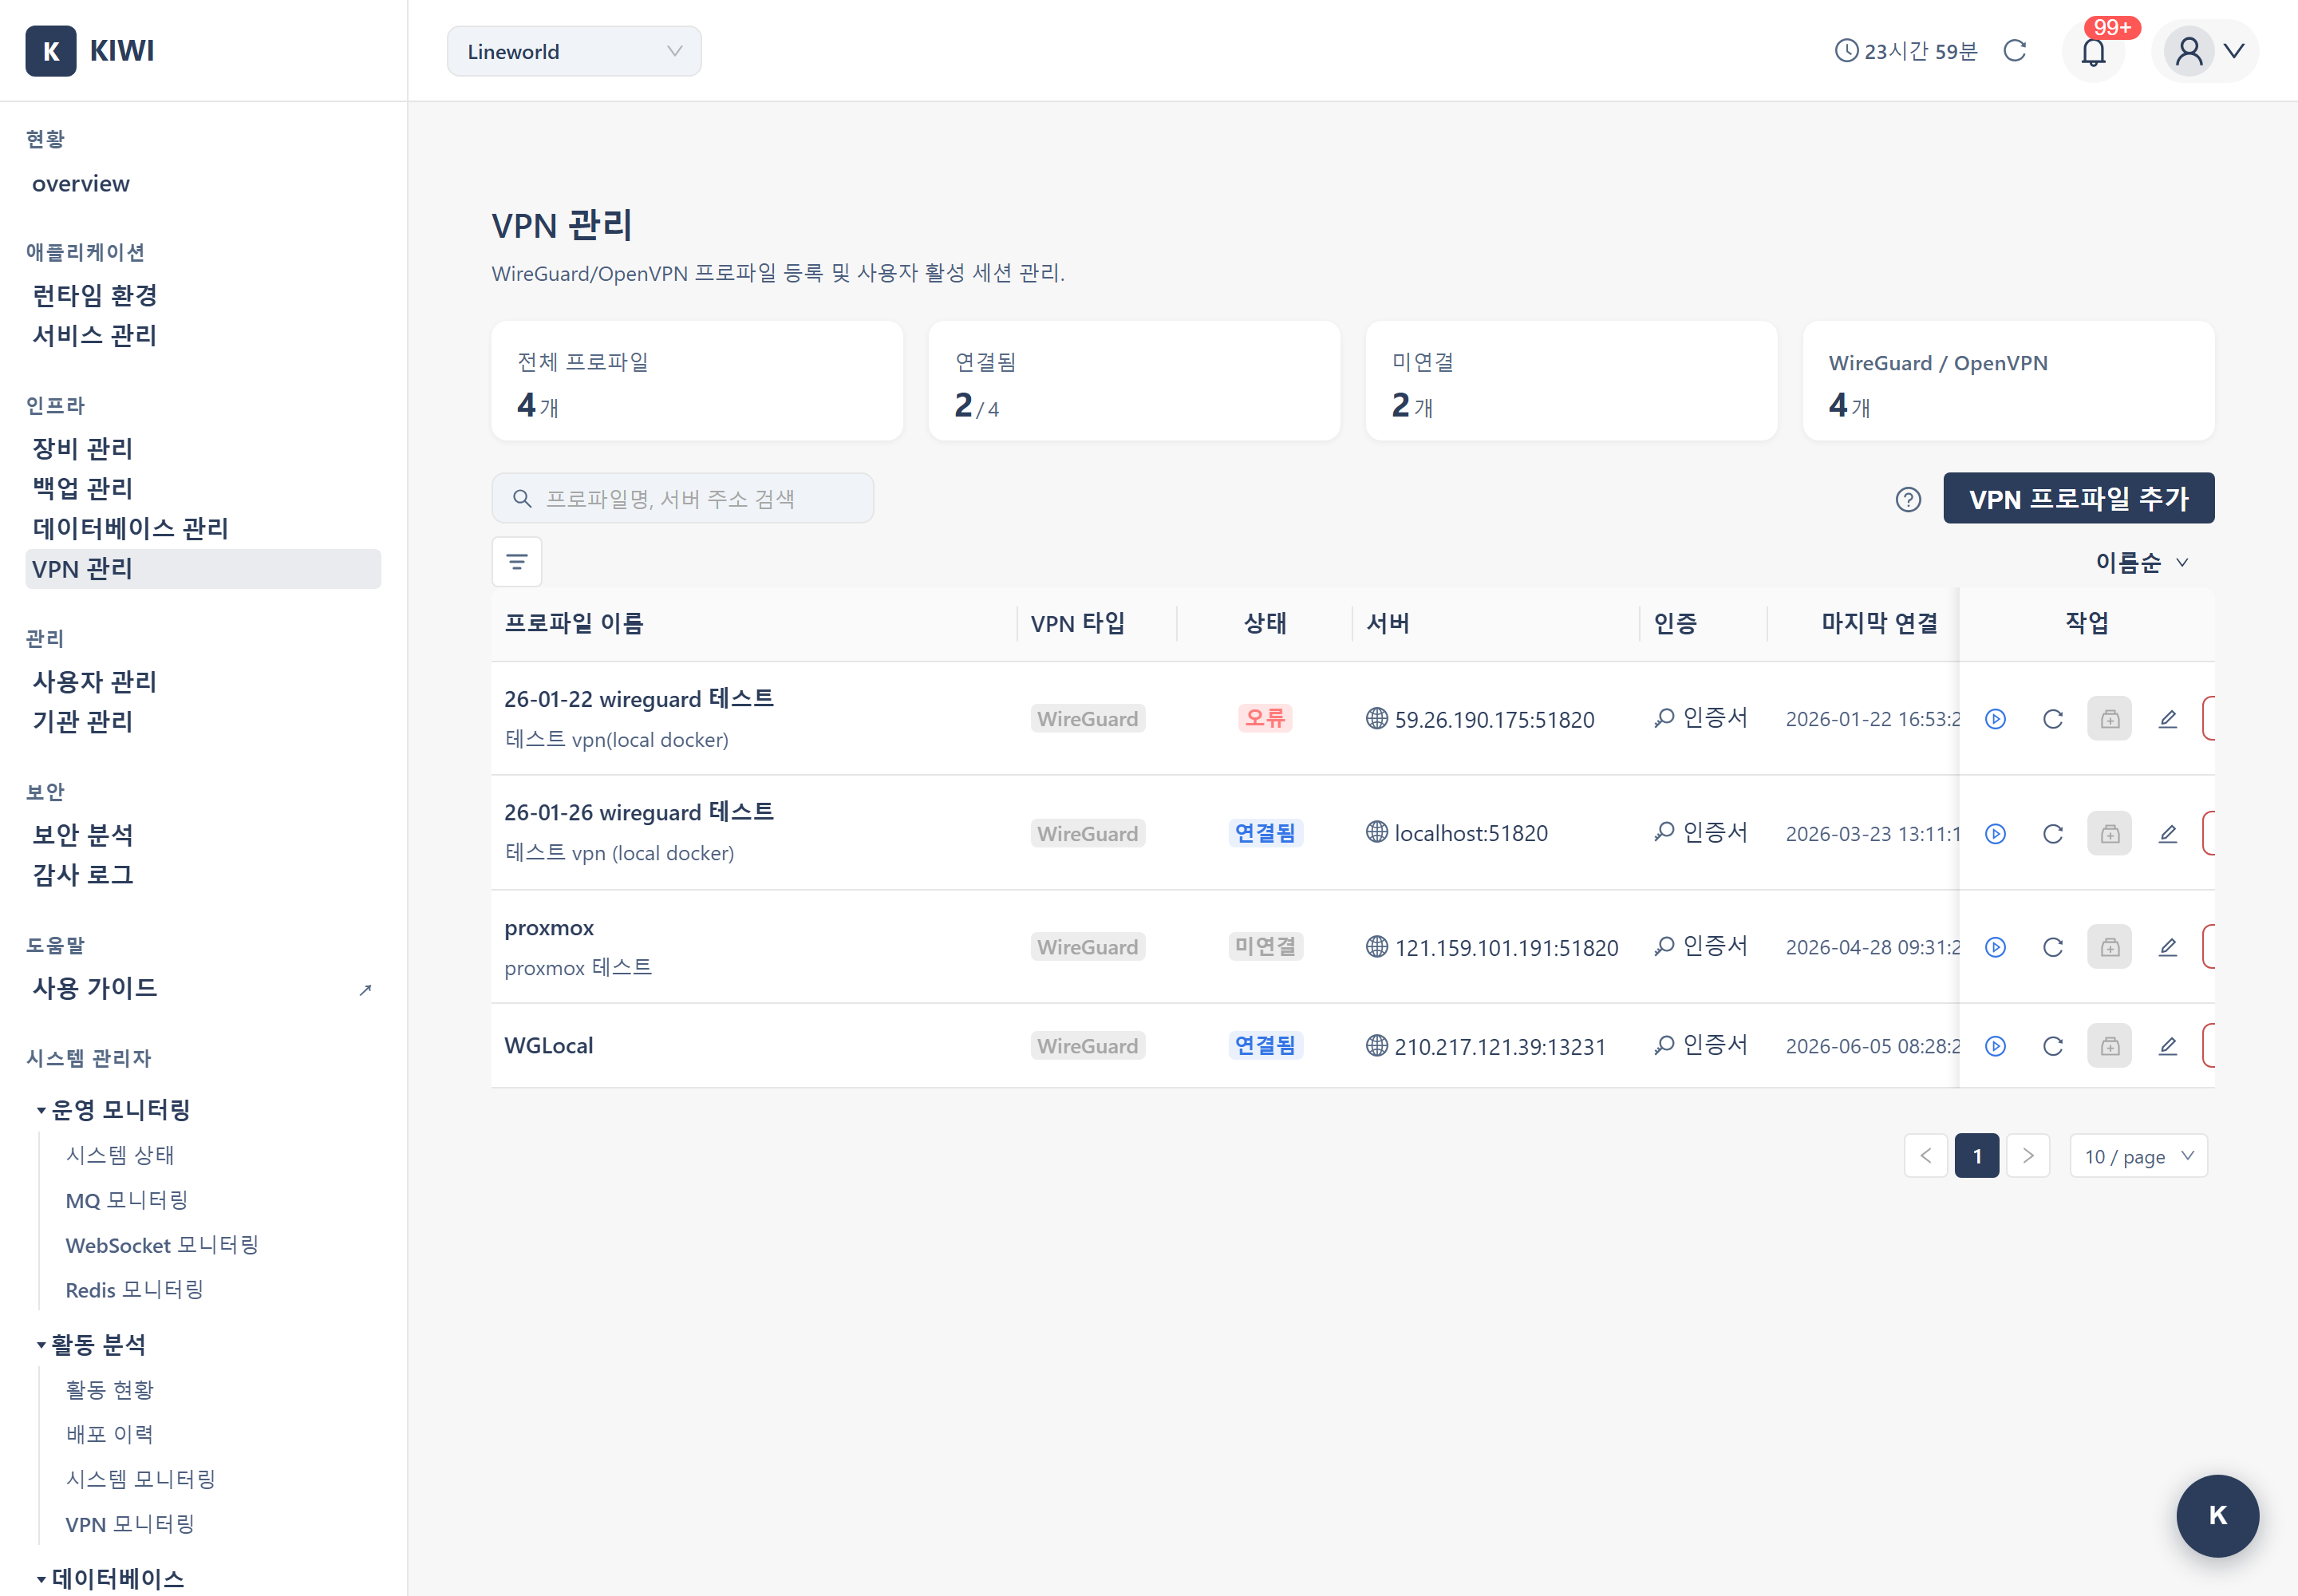
Why Do You Need VPN?
VPN (Virtual Private Network) is a technology for securely accessing your internal network from remote locations. It creates an encrypted "virtual private line" (a tunnel) over the internet, so traffic cannot be read even if intercepted. With VPN you can access the internal network from anywhere, transmit data encrypted, allow just the VPN IP in the firewall instead of per-IP rules, and access clusters over the internal network without exposing the API to the public internet.
Supported VPN Types
KIOPS currently provides full support for WireGuard. OpenVPN and IPSec appear in the UI as placeholders for future support but cannot be selected at this time.
- WireGuard (fully supported): A lightweight protocol with fast speed and simple setup. Keypair-based authentication,
.confimport/export, and mobile compatibility are all available out of the box. - OpenVPN (coming soon): Planned for future addition to support compatibility with existing OpenVPN infrastructure. The option is currently disabled in the profile creation form.
- IPSec (coming soon): An enterprise standard protocol; planned to be added together with OpenVPN support.
At this stage, simply use WireGuard — there is no other option to weigh up. It is proven in security, performance, and operational simplicity, and works well on mobile networks.
Creating a VPN Profile
How to set up a VPN for accessing remote infrastructure.
Permission Notice: If you cannot access this feature, please request permission from your organization manager.
Step 1: Navigate to the VPN Management Page
Click [VPN Management] in the left menu.
Step 2: Add a New VPN Profile
Click the Add VPN Profile button. The VPN profile settings modal opens. (If the list is empty, click the Add your first VPN profile button.)
Step 3: Select the VPN Type
In the VPN type dropdown, select WireGuard. OpenVPN and IPSec are shown with a "coming soon" label and cannot be selected.
Step 4: Enter Basic Information
Enter the basic information for the VPN profile:
- Profile name: A name to identify the profile. (e.g.,
datacenter-vpn) - Description: A description of the profile. (e.g.,
VPN for data center access) - Server address: IP or domain of the VPN server. (e.g.,
vpn.company.com) - Port: VPN port. (e.g., WireGuard default is
51820)
If you already have a WireGuard configuration file (.conf), use the Import from .conf button below the guidance text in the key information section to populate the server address, port, keys, internal IP, allowed IPs, and keepalive value in one step.
Step 5: Configure Authentication Credentials
Enter the keys required for WireGuard authentication.
- Private Key (client private key): Click the Generate Client Keypair button next to the field, and KIOPS immediately generates a secure Curve25519 keypair. The private key is filled into the input automatically. The matching public key is shown in a separate notice. You must share the displayed public key with the VPN server administrator so it can be registered as a peer. If you already have a key issued externally, you can paste it directly instead.
- Public Key (server public key): The public key of the VPN server you want to connect to. Enter the value provided by the server administrator. (This is different from the client public key generated by KIOPS in the previous step.)
- Preshared Key: A pre-shared key. Enter only if the server uses PSK. (Optional, for additional security.)
KIOPS encrypts the private key with AES-256-GCM at rest, and once saved it is masked and cannot be retrieved again. If you need a copy, back it up from the screen shown immediately after clicking Generate Client Keypair.
Step 6: Configure Network Settings
Enter the VPN network settings:
- Internal IP: The IP to be assigned within the VPN. (e.g.,
10.0.0.2/24) - Allowed IPs: Networks to route through the VPN. (e.g.,
10.0.0.0/8, 192.168.0.0/16) - DNS: DNS server to use in the VPN. (e.g.,
10.0.0.1) - PersistentKeepalive: Keepalive interval used to keep the connection alive behind NAT. (Default 25 seconds, recommended.)
Step 7: Save and Test
Click the Save button. From the profile list, click the Test Connection button on the row to verify that SSH connectivity through the VPN tunnel is possible. For the test you enter the target host IP, SSH port, username, and password, and the result is shown in the modal as success/failure along with the response latency (ms). (Step-by-step tunnel diagnostics such as whether the WireGuard handshake is established are provided by the separate session diagnostics feature.)
Activating a VPN Connection
How to connect using a configured VPN profile.
Step 1: Select a VPN Profile
Select the VPN profile to connect to from the profile list on the [VPN Management] page.
Step 2: Start Connection
Click the Connect button.
Step 3: Check Connection Status
Check the connection status (Connected / Connecting / Disconnected / Error). For the meaning of each status badge and how to respond, see the Status Reference.
Step 4: View Connection Information
When the connection is established, you can view the assigned internal IP, data transfer volume, connection time, and handshake status.
Connection Method (VPN / Direct SSH)
For any operation that requires SSH (devices, runtimes, builds, deployments, and so on), KIOPS evaluates the target's access path and decides how to connect.
- If there is only one access path (no VPN profile covers the target IP), KIOPS auto-connects via Direct SSH without showing a selection modal.
- Only when both direct and VPN access are possible (the target IP is covered by a VPN profile's AllowedIPs) does the connection method selection modal appear so you can decide the routing. Two options are available:
- VPN: Connect through the VPN tunnel. If no active session exists, a quick-connect modal opens to establish the VPN connection; if the target IP is outside AllowedIPs, an explicit error message is shown.
- Direct SSH: Connect directly without VPN, using the registered multi-hop chain (jump server → target) as-is.
KIOPS previously offered three modes (Auto / VPN / Direct SSH), but now you explicitly choose between just two: VPN and Direct SSH (a single access path auto-connects directly). When the modal appears, the default is VPN if an active VPN session exists, otherwise Direct SSH.
With VPN, you don't need jump-server credentials. On the VPN path, when an active session exists and the target IP is within AllowedIPs, KIOPS automatically skips any registered jump-server (parent device) hops and connects using only the target server's SSH information. The VPN itself takes over the jump server's role.
If you choose Direct SSH instead, the registered multi-hop chain is used in full, so you need credentials for both the jump server and the target. Credentials you enter once are stored encrypted and reused automatically.
Note that for automatic hop stripping to work in multi-hop infrastructures, the active VPN's endpoint must match one of the registered gateway hops. If it does not, KIOPS skips stripping to avoid colliding with the same private IP range from a different site, and VPN mode is refused with a message telling you to use Direct SSH.
Configuring Infrastructure Access via VPN
How to register a cluster that is only accessible through VPN.
Prerequisite: A VPN profile must be configured and an active session must exist.
Step 1: Activate VPN Connection
Connect first to the VPN that provides access to the target network. Confirm that the VPN status indicator in the header shows the connection as active.
Step 2: Navigate to the Runtime Environment Page
Click [Runtime Environment] in the left menu.
Step 3: Import External Runtime
Click the Import External Runtime button. If the target is covered by a VPN, the connection method selection modal appears, the active matching VPN profile is selected automatically, and VPN mode is chosen by default. You can switch to Direct SSH if needed, or pick a different profile from the dropdown when multiple matches exist.
Step 4: Enter Cluster Connection Information
Enter the cluster connection information using the internal network address within the VPN (e.g. 192.168.1.100:6443). You don't need to enter jump-server information separately — the VPN tunnel takes the gateway role.
Step 5: Test Connection and Save
Test the cluster connection through the VPN, then save when it succeeds. If the test fails, suspect one of the following:
- The target IP is not covered by the VPN's AllowedIPs → extend the AllowedIPs in the VPN profile.
- The active VPN's endpoint does not match the registered gateway hop → pick a different VPN profile or use Direct SSH mode.
Importing/Exporting WireGuard .conf
How to register a profile quickly via a configuration file, or export a registered profile so it can be used with other clients.
Importing a .conf File
On the [VPN Management] page, open the Add VPN Profile modal, then click Import from .conf located below the guidance text in the key information section and upload a WireGuard configuration file. The following fields are filled in automatically:
- Server endpoint and port
- Client private key
- Server public key, preshared key
- Client internal Address, AllowedIPs, PersistentKeepalive
You only need to enter the remaining fields (profile name, description, and so on) and save.
Note: The KIOPS UI does not currently expose a .conf download button. Exporting a registered profile for use with another client is only available via the CLI tooling, and OpenVPN configuration export and QR code download will be reviewed when OpenVPN is officially supported.
Quick Connect
When you start an action that requires VPN access on the Device Management, Runtime Environment, or Service Management page and no VPN session is active yet, KIOPS shows a Quick Connect modal so you can activate VPN without leaving the page.
- The modal appears automatically when a VPN-required action is attempted.
- Pick an available VPN profile and click Connect — the handshake starts immediately.
- The VPN status indicator in the top-right of the header shows current session count and connection state with color and icon, so you can see VPN status at a glance from anywhere.
KIOPS's VPN sessions have no idle timeout; they stay active until you explicitly disconnect or log out, so you don't need to shorten keepalive values to avoid losing the session during long-running tasks.
Deleting a VPN Profile
How to delete a VPN profile that is no longer in use.
Step 1: Select the Profile to Delete
Click the VPN profile to delete on the [VPN Management] page.
Step 2: Confirm Disconnection
If the profile is connected, disconnect it first.
Step 3: Delete the Profile
Click the Delete button. Click Delete in the confirmation dialog.
Step 4: Check Related Resources
Check if any runtime environments are using this VPN. The connection of related runtimes may fail.
Frequently Asked Questions
VPN connection is failing
Causes and solutions:
- Server address error: Verify the IP or domain is correct.
- Port blocked: Allow the WireGuard port (default
51820/UDP) in the firewall. - Authentication error: Verify the private key and the server public key are correct, and confirm that your public key has been registered as a peer on the server side.
- Server down: Check if the VPN server is running.
The Test Connection button on the [VPN Management] page checks SSH reachability through the VPN tunnel, while session diagnostics checks tunnel state such as whether the WireGuard handshake is established. The cause is shown on failure, making it much faster to find the root cause than with a generic VPN client.
VPN connection keeps dropping
- Keep-alive setting: For WireGuard, set
PersistentKeepalive = 25 - Network changes: Reconnection needed when switching between WiFi and mobile.
- NAT timeout: Check router NAT session timeout
Cannot access the cluster through VPN
Check the following three things.
- Allowed IP range: Is the cluster network (e.g.,
10.0.0.0/8) included in Allowed IPs? - Routing settings: Is routing to the cluster network configured on the VPN server?
- DNS resolution: Are internal cluster domains resolving? (Check VPN DNS settings)
Speed is slow
- Adjust MTU: Try a lower MTU (1280-1400) than the default.
- Server location: Use a VPN server in a nearby region.
- AllowedIPs scope: Setting too broad a range (such as
0.0.0.0/0) routes all traffic through the VPN and can be slow. Specify only the internal network ranges you actually need.
Related Guides
- Runtime Environment Registration - Registering a cluster via VPN
- Device Management - SSH tunnel setup