HPA Auto Scaling
Kubernetes-only feature. HPA (Horizontal Pod Autoscaler) is available only on the Kubernetes runtime. Docker · Podman runtimes have no auto-scaling or manual scaling features.
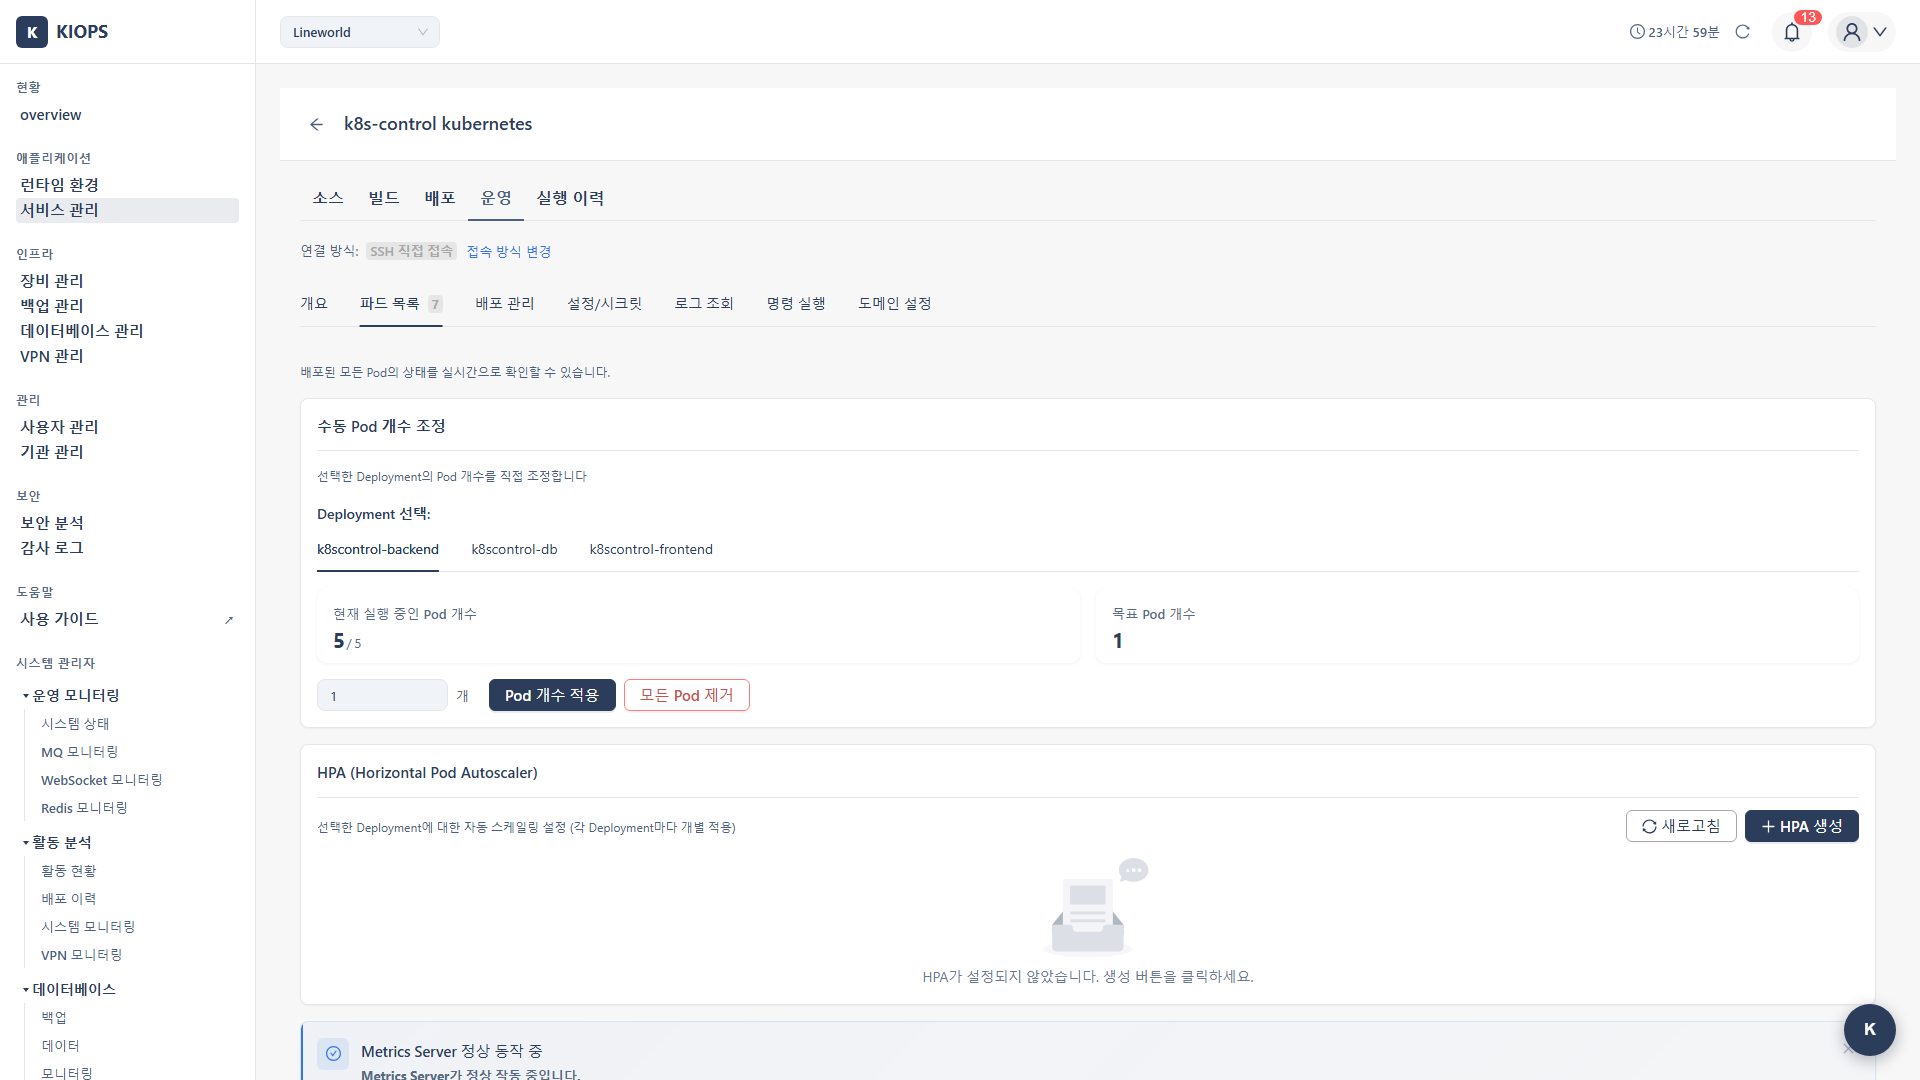
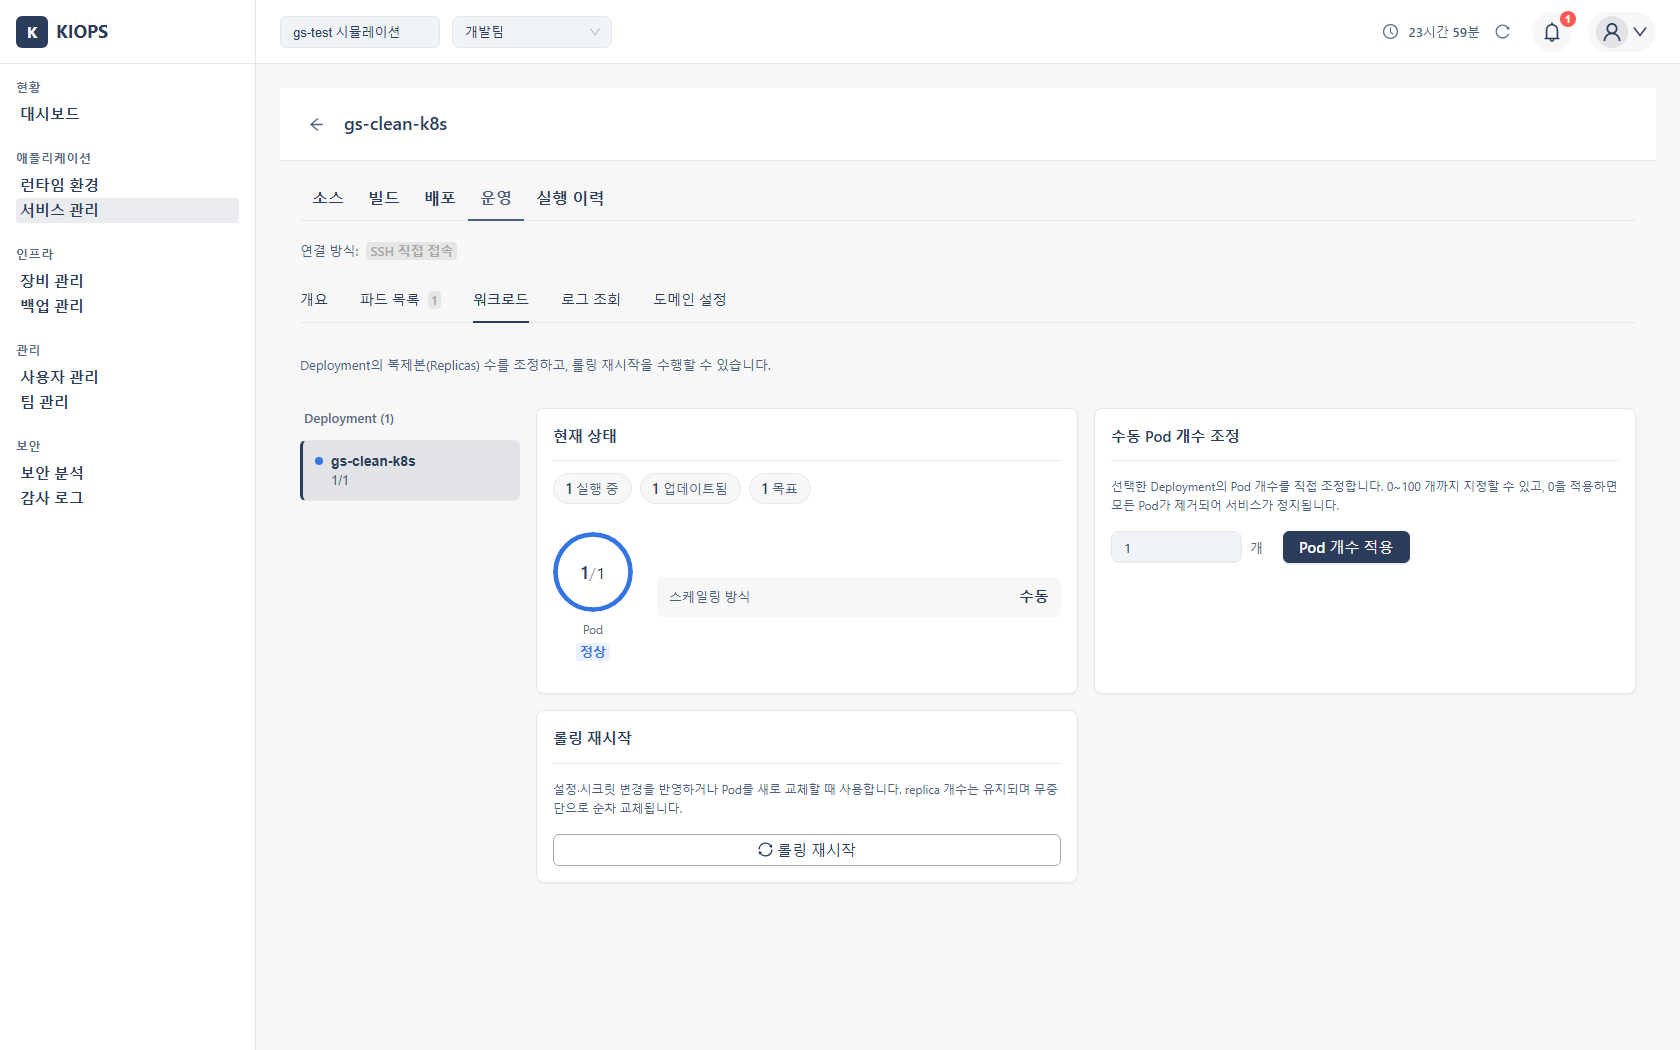
Manually adjusting scale every time traffic surges is tedious and risky. With HPA (Horizontal Pod Autoscaler), Pods automatically scale up or down based on service load.
HPA offers the following benefits.
- Automatic response: Pods are added automatically when traffic increases.
- Cost savings: Reduces Pods when traffic is low to save resources.
- Improved stability: Prevents manual operation mistakes.
HPA Capabilities in KIOPS
KIOPS's HPA supports CPU-based auto-scaling only, created internally via kubectl autoscale --cpu-percent. Memory-based scaling, multiple metrics, custom metrics (such as Prometheus), scale stabilization windows (stabilizationWindowSeconds), and scaling policies (Pods/Percent type, value, period) are not supported.
The configurable fields are:
- minReplicas: Minimum Pod count (default 1, recommended 2 or more)
- maxReplicas: Maximum Pod count (default 10)
- targetCPU(%): Target CPU utilization (default 80)
How It Works
[Metrics Server] → [HPA Controller] → [Deployment Scale]
        ↓                   ↓                    ↓
   Collect CPU       Compare to target     Adjust Pod count
Prerequisites
- Metrics Server must be installed on the Kubernetes cluster.
- The service must be deployed on K8s.
The resource usage shown in KIOPS needs no installation, but HPA separately requires metrics-server to be present in the cluster. KIOPS does not install metrics-server on your behalf, so a cluster administrator must install it directly. See Pod Resource Metrics for details.
Permission Notice: If you cannot access this feature, please request permission from your organization manager.
Creating an HPA
Step 1: Open the Operations Modal
- From the [Service Management] page, click the Operate stage for the target service.
- In the operations modal, go to the Workload tab.
Step 2: Enter the HPA Section
- Find the HPA section in the Workload tab.
- Click the Create HPA button.
Step 3: Enter Settings
Only the following three fields are required.
- Minimum Pod count (default 1, recommended 2 or more): Minimum Pods to maintain even under low load. Recommended at least 2 for high availability.
- Maximum Pod count (default 10): Maximum Pods to scale up to. Set considering cluster resources and costs.
- Target CPU utilization (default 80): Pods are added when CPU utilization exceeds this value. 70–80% is typically recommended.
Step 4: Create
- Click the Create button.
- KIOPS creates the HPA via
kubectl autoscale --cpu-percent. - If an HPA already exists on the same Deployment, the existing HPA is deleted and recreated.
HPA Card Information
A created HPA is displayed as a card in the Workload tab.
- HPA name
- Target Deployment
- Min / Max Pods
- Target CPU(%)
- Currently running Pod count
- Delete button
Clicking the Delete button removes the HPA and reverts to manual scaling.
HPA vs. Manual Scaling
While an HPA is active, manual scaling is locked. The backend also blocks kubectl scale in this state. To use manual scaling again, first remove the HPA via the Delete button on the HPA card.
Practical Use Scenarios
Scenario 1: Web Application
Requirements: Auto scale based on traffic.
Settings:
- minReplicas: 2
- maxReplicas: 20
- targetCPU: 70%
Scenario 2: API Server
Requirements: Fast scale up and stable operation.
Settings:
- minReplicas: 3
- maxReplicas: 50
- targetCPU: 60%
Scenario 3: Batch Workload
Requirements: Gradual scaling based on CPU load.
Settings:
- minReplicas: 1
- maxReplicas: 10
- targetCPU: 80%
Resource Request Settings
For HPA to work accurately, the Pod's CPU request (requests.cpu) must be configured. HPA calculates utilization based on this value when deciding to scale.
Resource Request Example
resources:
  requests:
    cpu: "200m"
    memory: "256Mi"
  limits:
    cpu: "500m"
    memory: "512Mi"
With this configuration, HPA targetCPU 70% means:
- 200m × 70% = 140m average usage maintains the current scale.
- Above that, scale up is triggered.
Memory limit is used only to prevent OOM and is not used as a scaling criterion by HPA.
Troubleshooting
HPA Not Scaling
- Metrics not displayed: metrics-server is missing from the cluster. Verify with
kubectl top nodes; a cluster administrator must install it directly (see Pod Resource Metrics). - Status shown as Unknown: Check whether
requests.cpuis configured on the Pod. HPA cannot calculate utilization without it. - Target not reached: Current CPU load is low and scaling is not needed. This is normal.
Excessive Scaling
- Too many Pods created: targetCPU is set too low. Increase to 70–80%.
- Pods in Pending due to resource shortage: maxReplicas reached or cluster resources are insufficient. Adjust maxReplicas or add nodes.
When You Need to Delete HPA
To use manual scaling or change settings, use the Delete button on the HPA card. Creating a new HPA on the same Deployment automatically deletes and recreates the existing HPA.
Best Practices
Here are recommendations for using HPA effectively.
Configuration Recommendations
The recommended values are as follows.
- minReplicas: 2 or more - Essential for high availability.
- targetCPU: 70–80% - Too low causes unnecessary costs.
- CPU request (
requests.cpu): Based on actual usage - Required for HPA to work accurately.
Monitoring
Regularly verify that HPA is working as intended.
- Check current Pod count: View the HPA card in the Workload tab.
- Alert when max is reached: If maxReplicas is hit frequently, raise the limit or review resource requests.
- Cost monitoring: Track cloud costs associated with scaling.
Testing
Validate HPA behavior before production deployment.
- Load testing: Increase traffic to verify scale up works correctly.
- Recovery testing: Reduce traffic to verify scale down works appropriately.
- Limit testing: Check service behavior when maxReplicas is reached.
Don't apply HPA settings directly to production. Test thoroughly in a staging environment first.
Disabling HPA
To remove an HPA, click the Delete button on its card in the Workload tab. After deletion, manual scaling (Apply Pod Count / Remove All Pods) is available again.
Related Guides
- Pod Resource Metrics - HPA prerequisites and where to find resource metrics.
- K8s Deployment - Kubernetes deployment settings.